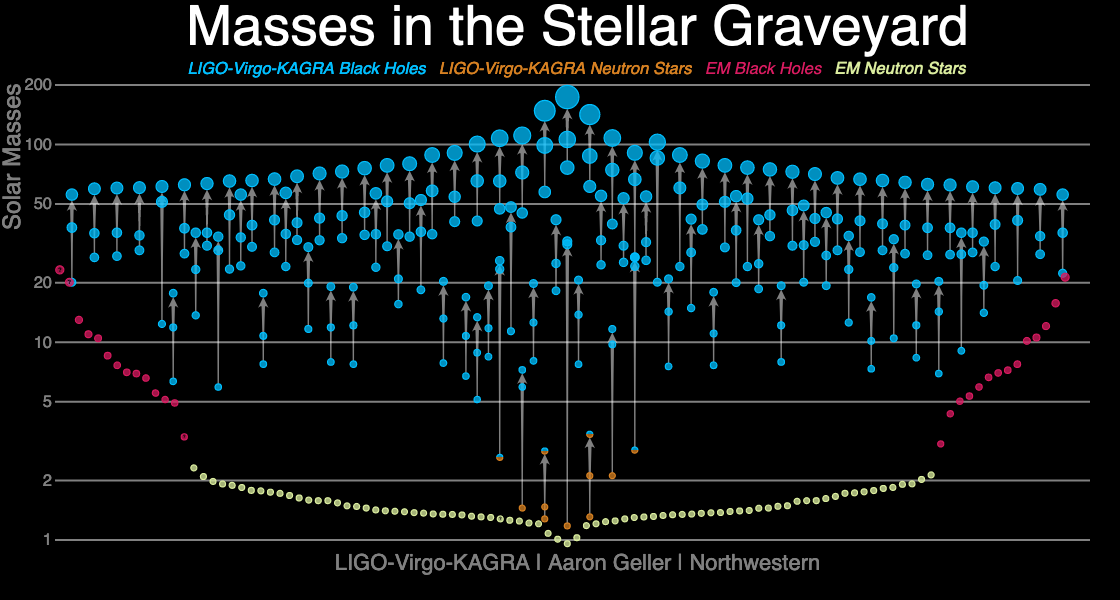
In 2015, astronomy had a big break through: this was the first time that we managed to observe black holes using gravitational waves!
Gravitational waves are emitted when 2 black holes circle around each other and eventually merge. We can measure the masses and spins of the inspiraling black holes from gravitational waves signals.
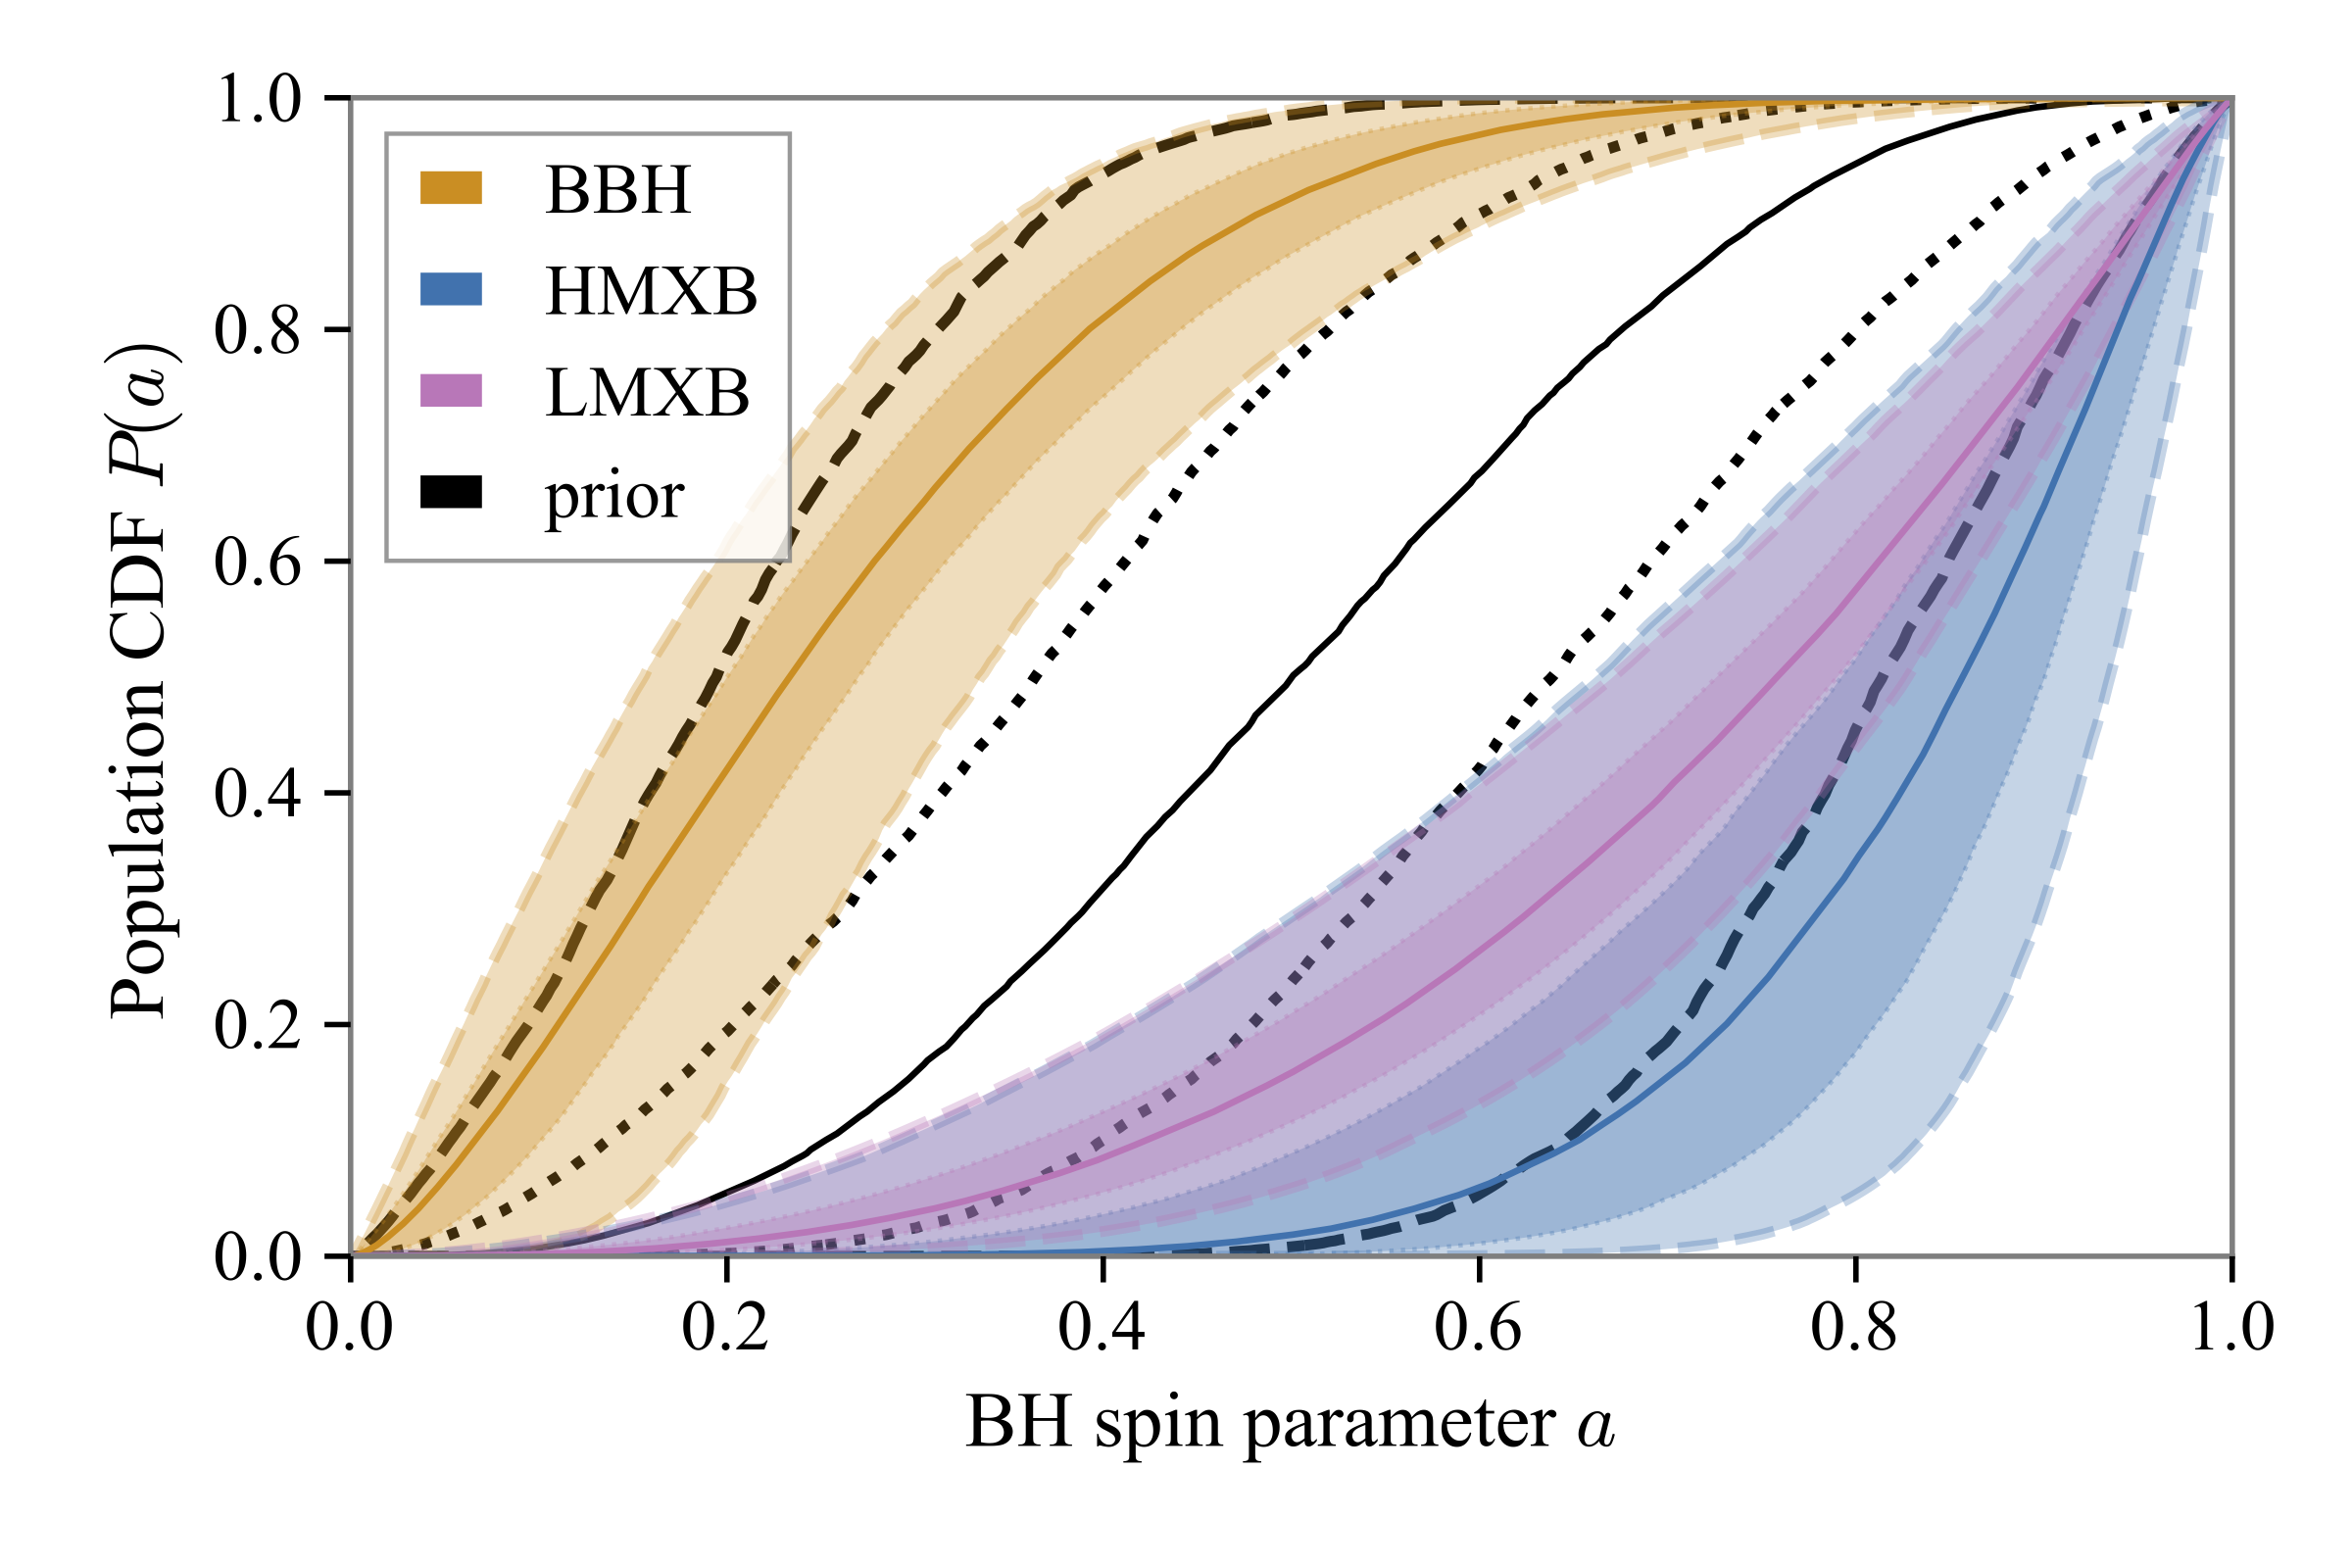
It came as a surprise to many astronomers that these black holes appear to be spinning very slowly.
This is because of observations of X-ray binaries: binaries consisting of a star and a black hole where the star is transferring mass to it's black hole companion.
Before we had gravitational waves, we had exclusively detected stellar-mass black holes through Xray binaries.
And all these Xray binaries have been observed to be spinning rapidly.
To date this is a hot research topic: Do we expect to form many spinning black holes or not?
Do the black holes in XRB and gravitational-wave sources form differently?
Are the observed XRB spins overestimated?
The first step to understanding this problem is to ask ourself if we expect the core of the star that came before the black hole is rotating.
In part 2 of this hackathon, we will look at the effect of different assumptions on the rotation of stars and their core.
We will explore three different cases that have an effect on the final rotation of the star and its core:
its birth rotation, angular momentum transport inside the star, and stellar winds.
We will start with creating a 15Msun Zero Age Main Sequence star at solar metallicity (Z=0.02), and safe this ZAMS model.
To do this, it is useful to start from the
There are two test_suites that are of interest to us today:
Similar to day one, we will start by copying the test suite to our home directory.
We now want to load our zams model in a new inlist.
For the next few exercises, we want to save more output than what is set by default.
For this the output in the 15Msun model is a good example.
Moreover, we know it's fun to see a bunch of numbers running across your screen,
but it's even better to have pictures show up while we are running our model!
We will use the PGstar plot that comes from the 15Msun_dynamo model
When you have successfully activated the pgstar plot, run the star again (i.e. type Part 2 of Hackathon: Rotating stars
Scientific background: should black holes spin?
Creating a ZAMS model
$MESA_DIR/star/test_suite/ (just like we did in Part 1).
Note how MESA has a lot of test suites available that can be very useful to start from when setting up a new model!
make_zams, and 15M_Dynamo.
The latter is a bit more complicated than what we will do today, but it does contain some useful files that we will use in our own project.
Task 2.1:
cp -r $MESA_DIR/star/test_suite/make_zams ~/rotating_star_proj
inlist_zams to run a 15Msun star, at a metallicity of 0.02 (for the latter, change both Zbase and initial_z).
~/home/rotating_star_proj, and
./clean ./mk and ./rn your code
(it should take about a minute to create zams.mod)
Check that file called zams.mod has appeared. Congratulations, you just created a ZAMS model!
Loading our ZAMS model
task 2.2: Creating a new inlist
inlist_rotating_star to your new file with the same name.
Note that all that this inlist does is reset the age and module_number to zero at the start,
and wants to run a $15\,M_{\odot}$ star at a metallicity of $Z= 0.02$.
max_model_number = 250 to the &controls.
load_saved_model = .true.
load_model_filename = 'zams.mod'
task 2.3: Setting up your run
inlist_rotating_star.
In the file inlist, find and replace all "inlist_zams" to "inlist_rotating_star".
~/rotating_star_proj there is a folder called src, with a file called 'run_star_extras.f90'.
Replace the contents of this file with the contents of the file run_star_extras.f90
Note: We have made a small change in this file to save some extra output that will be useful for the next exercises.
In the last section on Winds, we will get back to 'run_star_extras.f90' and learn how to add your own extra output.
rn file determines which inlist is called first.
We want to make sure that this now calls inlist.
You can achieve this by commenting out 'do_one inlist_zams_header zams.mod' and adding
'do_one inlist'.
./clean ./mk and ./rn when you finished all steps! Setting output and pgplot
task 2.4
history_columns.list, and profile_columns.list from $MESA_DIR/star/test_suite/15M_dynamo
to your rotating_star_proj directory.
pgstar_flag = .true. in your inlist_rotating_star,
and add the following code to the end of the same file:
&pgstar

	file_white_on_black_flag = .true. ! white_on_black flags -- true means white foreground color on black background
	file_device = 'png'            ! png
	file_extension = 'png'

	!file_device = 'vcps'          ! postscript
	!file_extension = 'ps'

	pgstar_interval = 50
	file_digits = 8

	Dynamo_legend_txt_scale_factor = 0.7
	Mixing_legend_txt_scale_factor = 0.55
	Profile_Panels4_txt_scale = 0.8

	Profile_Panels4_win_flag = .true.
	Profile_Panels4_win_width = 7

	Profile_Panels4_file_flag = .true.
	Profile_Panels4_file_dir = 'png'
	Profile_Panels4_file_prefix = 'profile_Panels4_'
	Profile_Panels4_file_interval = 50
	Profile_Panels4_file_width = 10

/ ! end of pgstar namelist
./rn in your terminal) and a screen will pop up that looks like:

- © Untitled
- Design: HTML5 UP